How do I customize a menu QR code?
Here are the steps for personalizing your QR code menu:
1. Click the “Stores” button to access your menu QR code
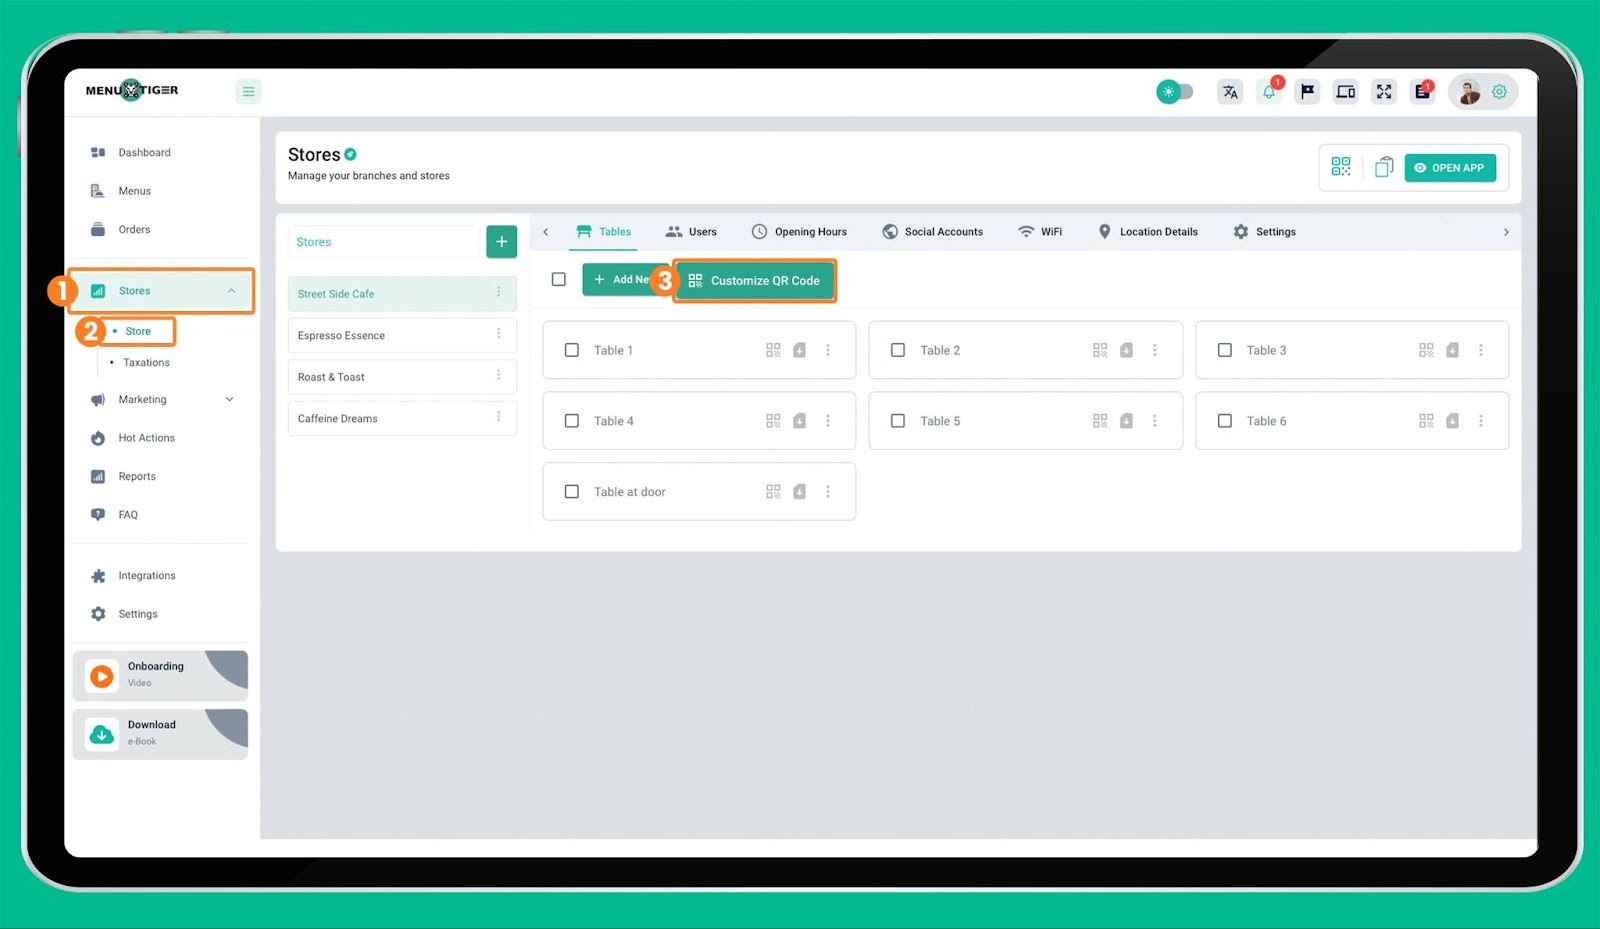
This will lead you to the Store Management page. For multi-store owners, select the store of the QR code menu you would like to customize. Tap Customize QR Code.
2. Add your logo to your QR code
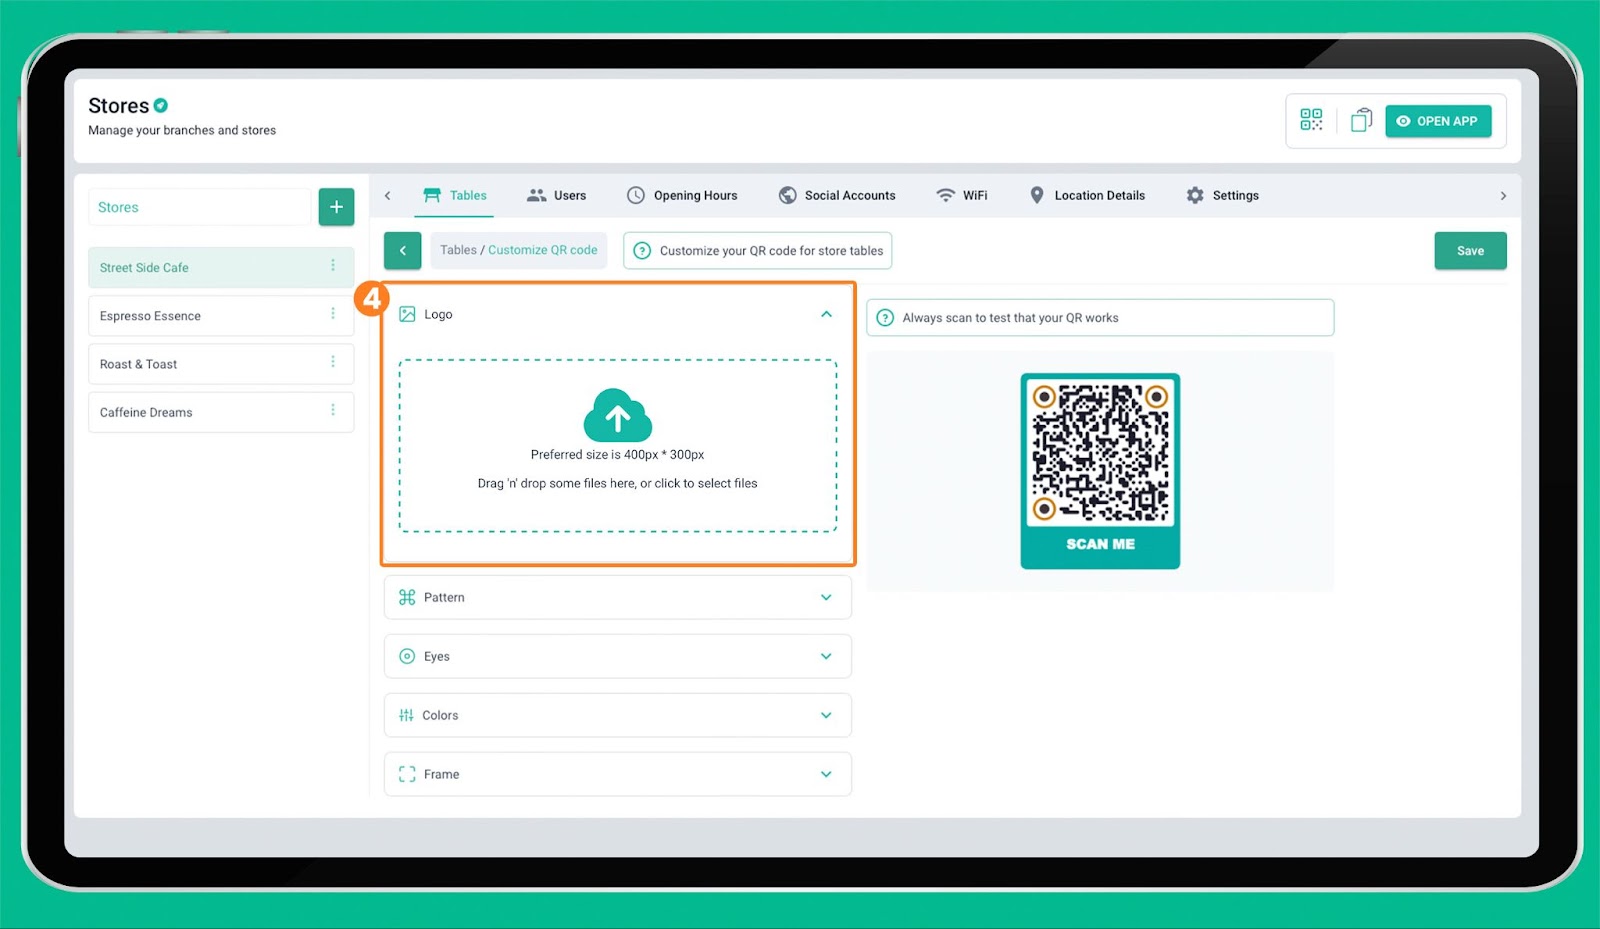
To place a logo at the center, upload your restaurant’s logo in PNG and JPEG format. We recommend using 400px x 300px to ensure the best quality of the logo once added to the QR code.
3. Choose the QR code data and eye patterns
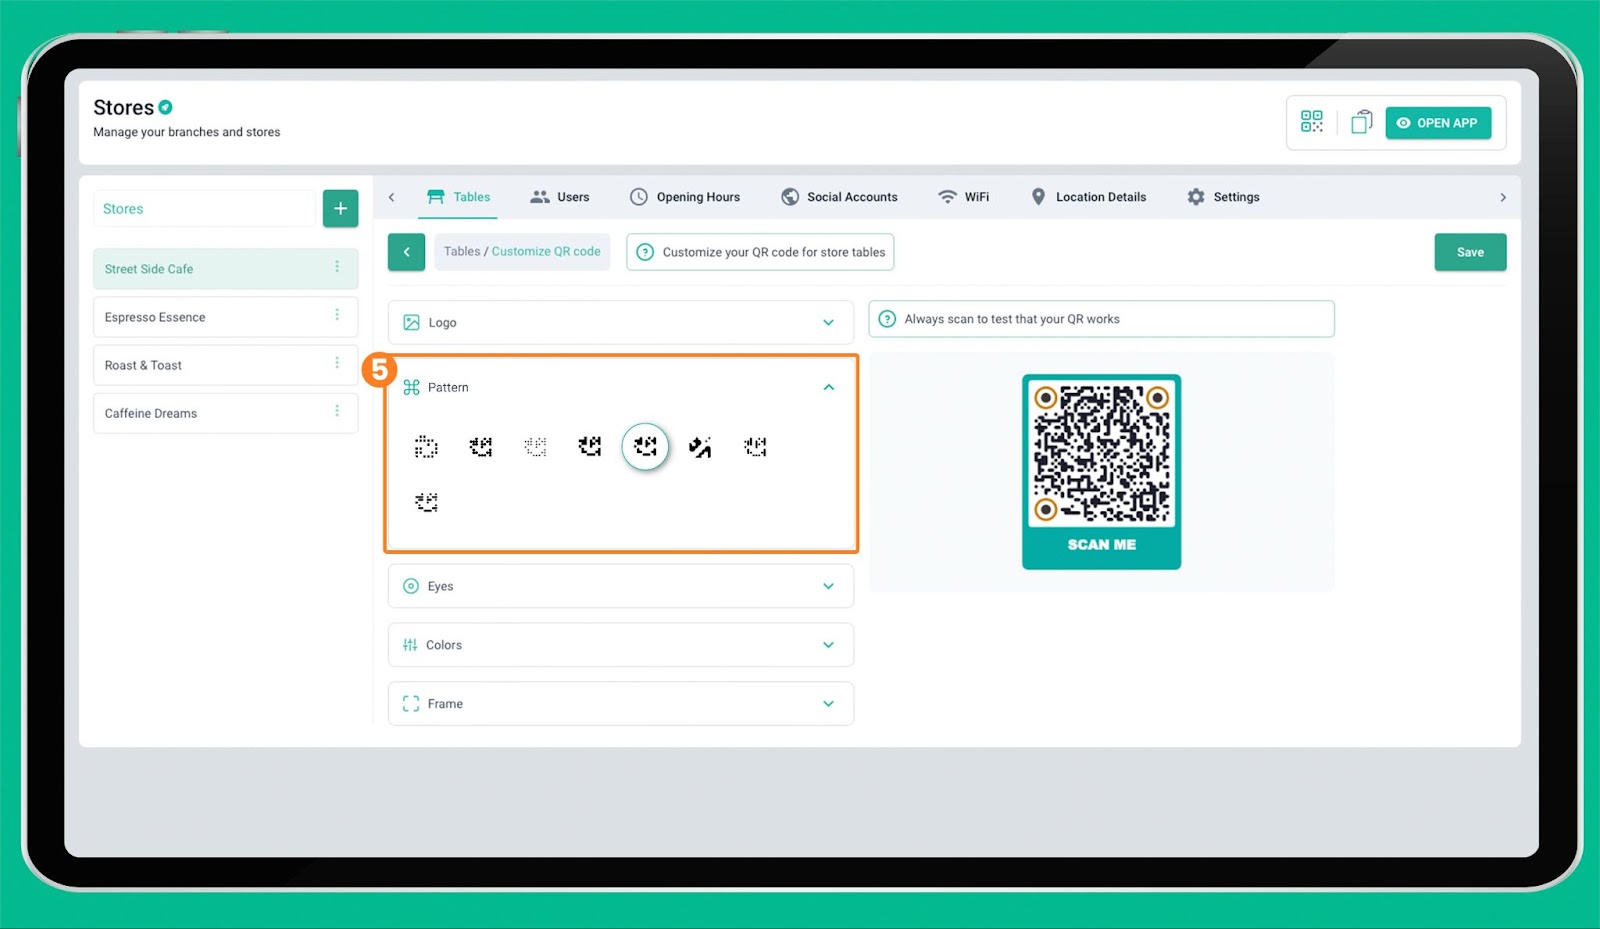
Click the Pattern button to expand the data pattern customization tools. You can choose square, round, dotted, or diamond patterns, depending on your branding.

For the eye pattern, tap the Eyes tab. You can access 15 eye patterns that you can use for your menu QR code.
4. Customize the QR code colors
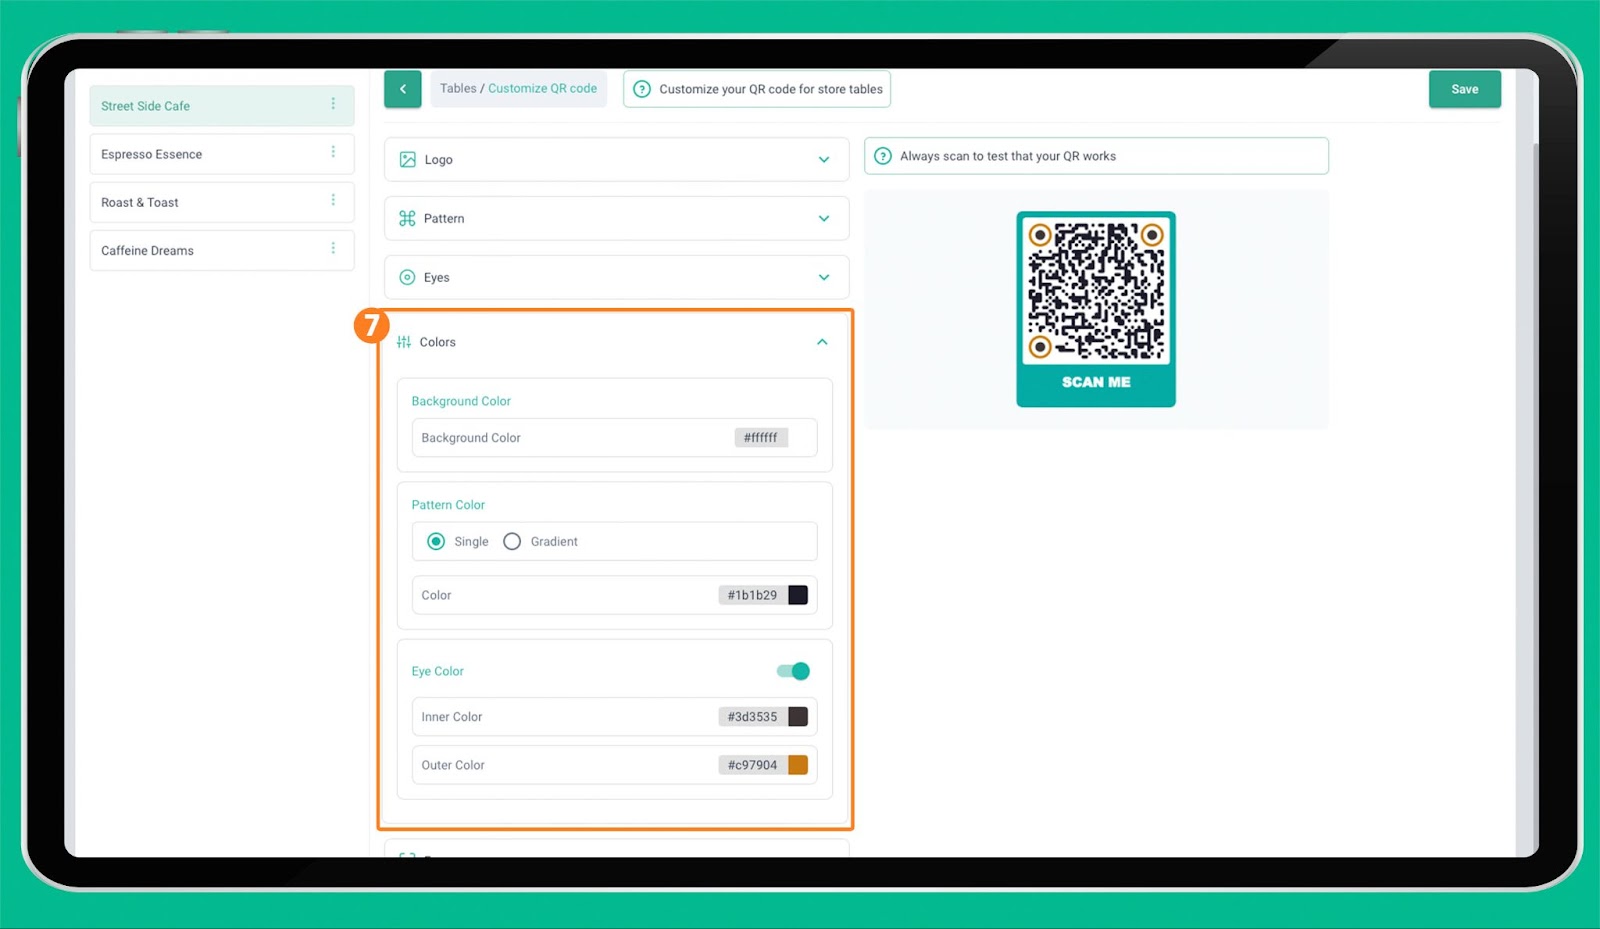
Click Colors to expand the color selection tools. This is where you can customize the code’s pattern as a Single or Gradient color depending on your visual brand identity.
For the QR code eye color, you can set it to default—meaning it will acquire the colors set for the patterns—or click the toggle on to use different set of colors.
Reminder: Always choose a lighter color for your background and keep a darker color for the patterns. This will ensure the scannability of your QR code menu.
- Add a frame and a call to action
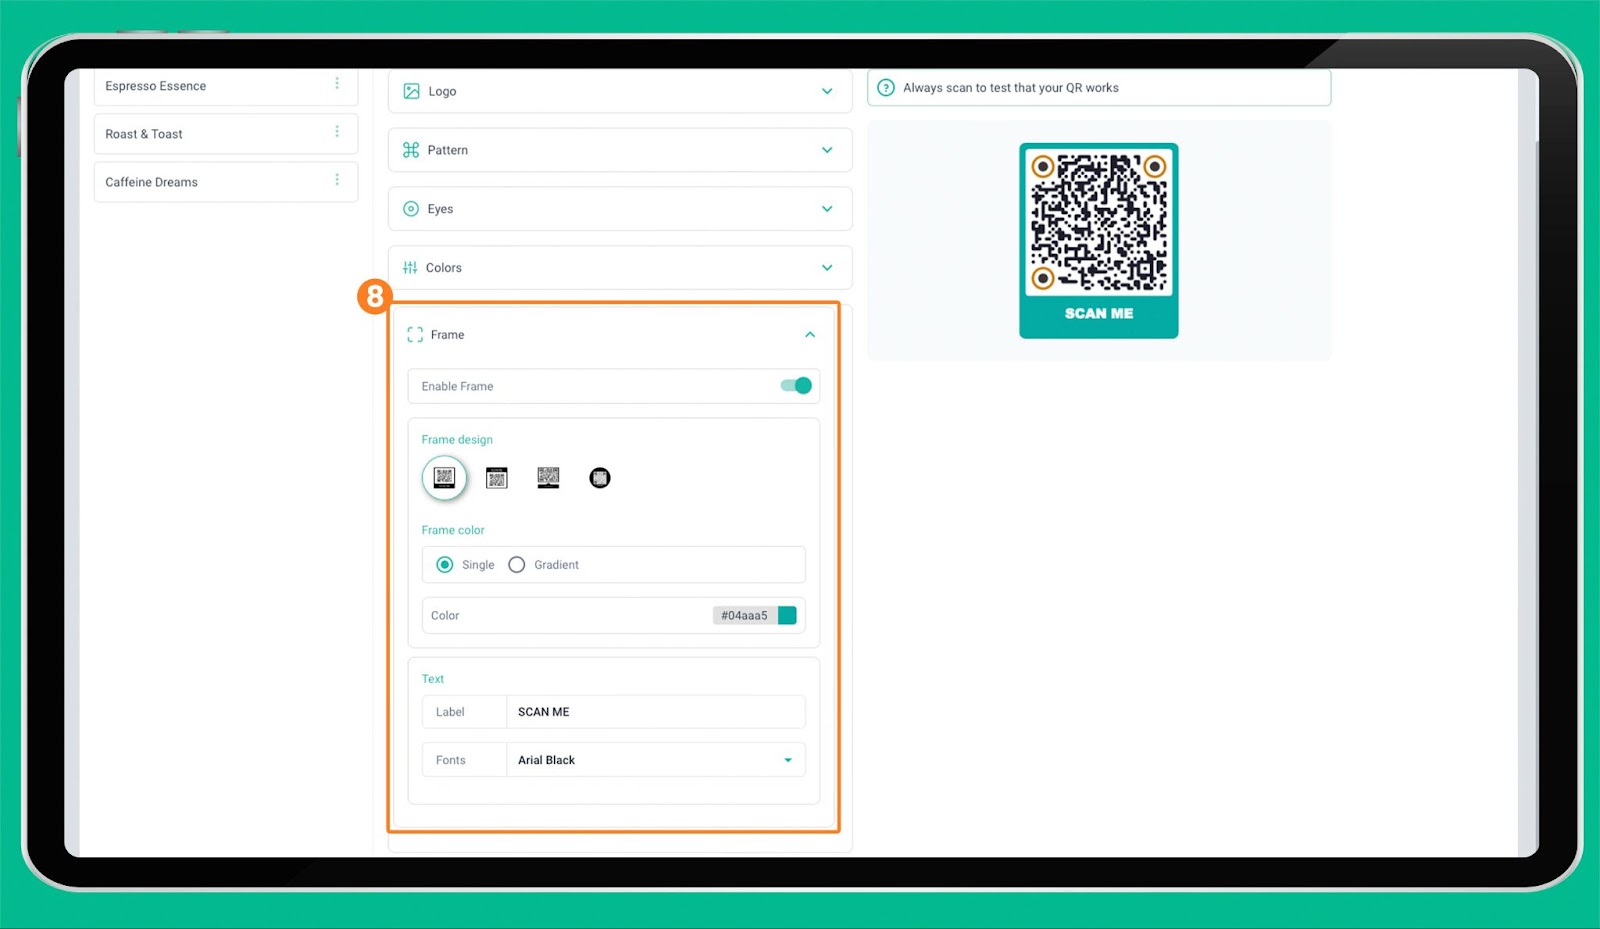
Choose a frame design and set your frame color. Finally, add a frame text or a call to action (CTA), like “Scan Menu,” “Scan for Menu,” “Menu? Scan Me”, etc., to direct or prompt your customers in scanning your menu.
- Perform a test scan and save
Try scanning your customized QR code to know if it is scannable and leads you to the appropriate landing page.
The QR code should redirect you to your online ordering page with its corresponding table number for easy order tracking.